
In the rapidly evolving landscape of eCommerce, the significance of having top-notch product images cannot be overstated. They play a critical role in capturing the attention of potential customers, driving sales, and enhancing the overall brand image. The results of a study on online shopping indicated that 67% of online shoppers considered high-quality images to be crucial when making purchasing decisions.
In this blog, we will understand different types of photo retouching techniques, the preparation steps essential for retouching, and overcoming the challenges involved in the retouching process.
Photo Retouching Techniques
Basic Techniques
These techniques involve correcting common issues that affect image quality, such as color, exposure, contrast, sharpness, resizing, cropping, shadows, highlights, and white balance correction.
- Color correction: Color correction involves adjusting the colors in an image to make them more accurate or vibrant. This technique is often used to correct color casts caused by poor lighting or camera settings.
- Exposure adjustment: Exposure adjustment involves altering the brightness and darkness levels of an image to improve overall visibility. This technique can help correct images that are too dark or too bright.
- Contrast adjustment: Contrast adjustment alters the difference between light and dark areas of an image. This technique can help make images appear more dynamic and visually striking.
- Sharpness adjustment: Sharpness adjustment involves increasing the clarity and detail in an image. This technique is often used to enhance the focus of product images, particularly for close-up shots.
- Resizing and cropping: Resizing involves altering the dimensions of an image, making it larger or smaller. Cropping, on the other hand, involves removing a portion of an image to achieve the desired composition. These techniques are often used to ensure that product images are optimized for web use.
- Shadow and highlight correction: Shadow correction helps to bring out details in dark areas of an image, while highlight correction helps to recover details in bright areas of an image that might have been lost due to overexposure. This technique is often used in product photography to ensure that all areas of the product are well lit and visible.
- White balance correction: White balance correction refers to adjusting the color temperature to make the whites appear more neutral in your photos . This technique is often used to correct images that appear too warm or cool.
Advanced Photo Retouching Techniques
These techniques include more complex edits, such as background removal, object removal, clipping path, masking, retouching skin and hair, adding or removing elements, and creating 3D product images.
Background Removal
This involves removing the background of an image to isolate the product. Image background removal technique is often used to create product photos with a white or transparent background, which is commonly used in eCommerce. Some techniques for that are:
- Object removal: This technique helps remove unwanted elements from an image, such as dust, scratches, or other imperfections. This technique can help create cleaner and more professional-looking product images.
- Clipping path: This technique creates a vector path around the edges of an image to isolate the product from the background. This technique is often used to create precise and accurate product images with a transparent background.
- Masking: Masking creates a layered mask in an image to hide or reveal selective areas of the image. This technique can help create more complex product images, such as composites or collages.
Retouching Skin and Hair
Retouching of skin and hair includes editing the skin and hair of models or mannequins in product images to enhance their appearance. This technique can help create more visually appealing product images that highlight your product’s USP and other features.
Element Manipulation
Sometimes you may want to add or remove certain elements from the product image to make it more visually appealing. This could include adding a logo or text to the image or removing distracting elements such as reflections or shadows.
Creating 3D Product Images
3D product images can provide customers with a more detailed and interactive view of the product. This technique involves creating a 3D model of the product and placing it in a virtual environment, where customers can view it from different angles and interact with it.
Preparation for Photo Retouching
Before diving into photo retouching, it’s essential to prepare for the process to ensure high-quality results. This involves good product photography – read below to find out some tips for taking good product images and guidelines for image resolution and size:
Tips for Taking Good Product Images
- Use proper lighting: Adequate lighting is essential to capture the details of the product correctly. You can use natural light or set up artificial light to create a well-lit environment.
- Choose the right background: The background of your product images can affect their quality. A plain, non-distracting background can help highlight your product.
- Use the right camera: A high-quality camera can help you capture images with a high resolution, allowing you to make edits without compromising the image quality.
- Take multiple shots: Taking multiple shots of a product can help you find the best angle and lighting to showcase it.
- Use a tripod: A tripod can help you take stable and consistent shots, ensuring that your product images are uniform.
Dealing with Difficult Lighting and Reflections During Product Photography
One of the biggest challenges in product photography is difficult lighting and reflections. Reflections can be particularly problematic when photographing shiny or reflective surfaces, such as jewelry or glassware. Here are some tips for overcoming these challenges:
- Use diffused lighting: Diffused lighting can help minimize reflections and produce more even lighting. Softboxes, umbrellas, and diffusers can all be used to diffuse light and produce a softer, more even lighting effect.
- Adjust camera angle: Sometimes simply adjusting the camera angle can help minimize reflections. Experiment with different angles and positions to find the best angle for your product.
- Use polarizing filters: Polarizing filters can help reduce glare and reflections in your images. These filters work by blocking polarized light and only allowing light that is polarized in a certain direction.
- Use post-processing techniques: If you are still having trouble with reflections after taking the photo, post-processing techniques such as cloning, healing, and masking can be used to remove reflections from the image.
Guidelines for Image Resolution and Size
- Image resolution: The ideal image resolution for product images is 72 dpi (dots per inch). This resolution is perfect for web display and ensures that the image quality isn’t compromised.
- Image size: eCommerce platforms have different size requirements for product images. Ensure that you know the requirements for the platform you’re using, and optimize your images accordingly.
Things to Consider Before Retouching
Once you’ve captured your product images, you’ll need to prepare them for the retouching process. Here are some steps to follow:
- Backup your images: Before making any changes to your product images, it’s essential to create backups in case anything goes wrong.
- Choose the right photo editing software: There are several photo editing software options available, including Adobe Photoshop and Lightroom. Choose the software that best suits your needs and expertise.
- Organize your images: Organize your images into folders to make the retouching process more manageable.
- Remove unwanted elements: Before retouching your product images, remove any unwanted elements that may distract from your product. For example, remove tags or logos that aren’t part of your product.
By following these steps, you can ensure that your product images are prepared and ready for the retouching process.
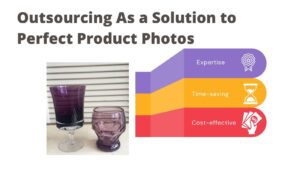
Outsourcing As a Solution to Perfect Product Photos
Outsourcing can be a great solution for eCommerce businesses that do not have the time, resources, or expertise to do the retouching themselves. It allows businesses to focus on their core activities and leave photo editing to professionals who specialize in it.
Benefits of outsourcing photo retouching services for eCommerce businesses include:
- Expertise: A professional photo retouching service provider will have the necessary skills and experience to deliver high-quality retouched images that meet the desired standards.
- Time-saving: It can free up valuable time that can be spent on other important tasks such as marketing and customer service.
- Cost-effective: Outsourcing can be a cost-effective solution compared to hiring an in-house photo editor, as it eliminates the need for equipment, software, and training.
- Scalability: It can help eCommerce businesses scale up or down as needed, without having to worry about hiring or firing employees.
Final Thoughts
In conclusion, high-quality product images are essential for eCommerce success, and photo retouching plays a critical role in achieving this goal. By following the tips and techniques outlined in this blog, eCommerce businesses can overcome common challenges in photo retouching, maintain consistency, and ensure the highest quality final product images. You may consider outsourcing photo retouching services for added efficiency and expertise.